How to Set Up Cisco AnyConnect on iOS
This guide shows you how to install and configure Cisco AnyConnect (Cisco Secure Client) on iOS to connect securely to PremierVPN.
Open Client Area View All Guides
Step 1: Install Cisco AnyConnect
- Open the App Store on your iOS device.
- Search for Cisco AnyConnect.
- Tap Get for the Cisco Secure Client to download and install.

Step 2: Open the App
Once installed, open Cisco AnyConnect from your home screen.

Step 3: Add a New VPN Connection
- On the AnyConnect main screen, tap Connections.
- Tap Add VPN Connection.


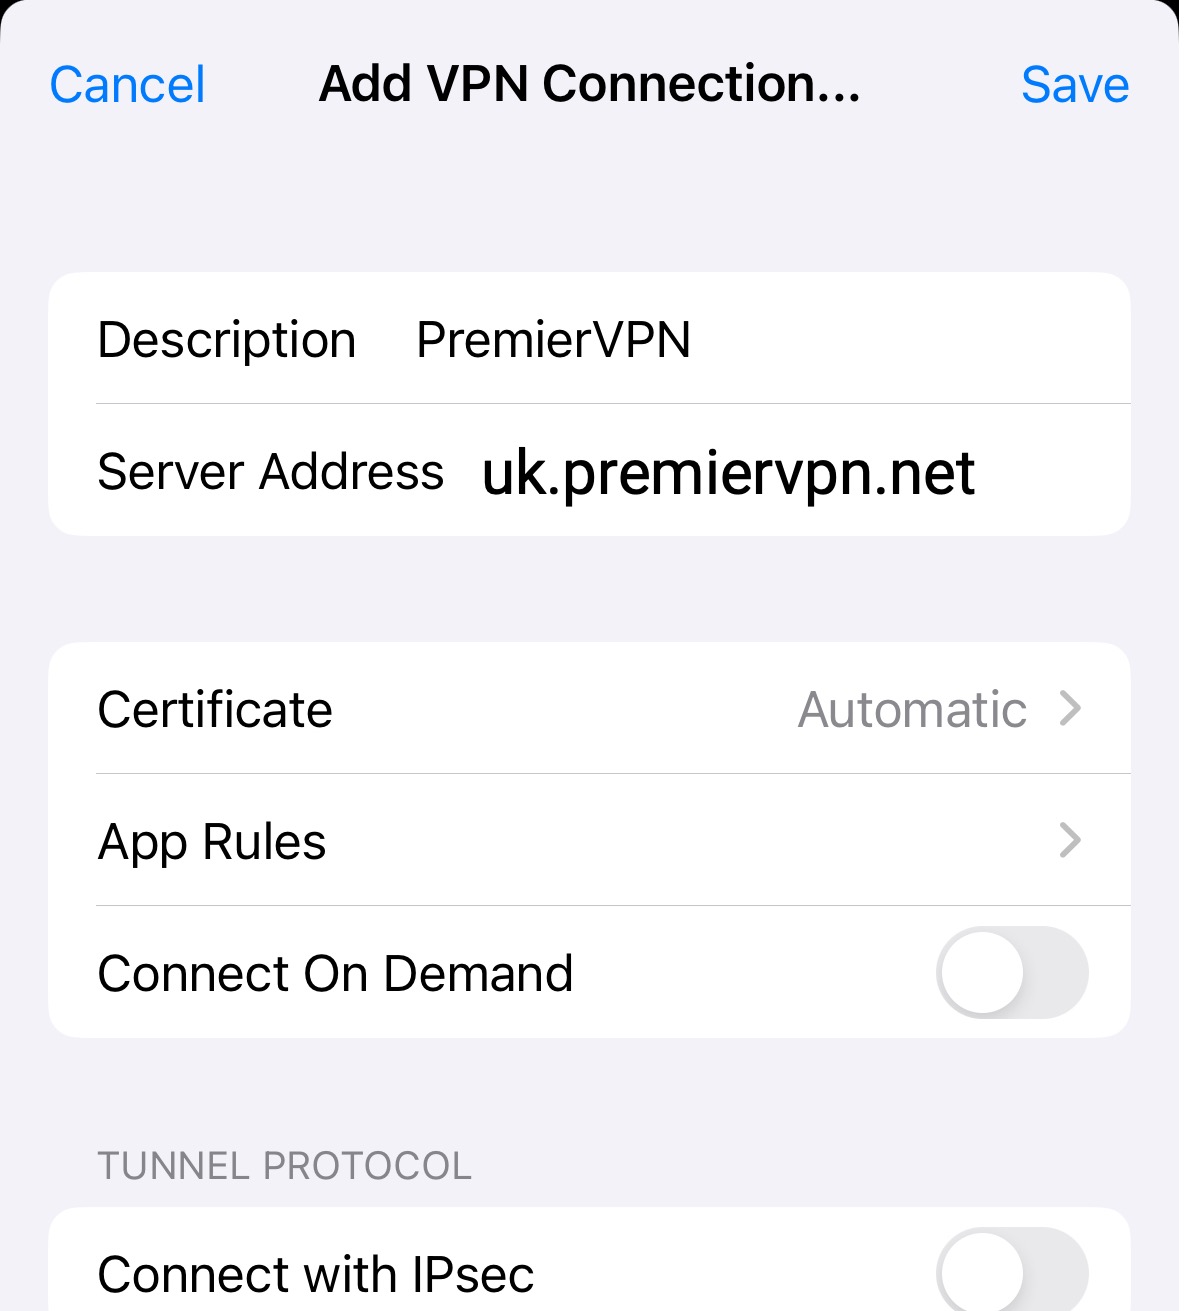
Step 4: Configure VPN Settings
- In the Server Address field, enter: uk.premiervpn.net.
- In Description, type PremierVPN.
- Enable Connect On Demand if you want automatic reconnection.
- Tap Save.
Tip: You can use any of our AnyConnect server hostnames. Find the full list here: AnyConnect Servers Page.
Step 5: Enable the VPN
- After saving, you’ll return to the Connections screen.
- Toggle the AnyConnect VPN switch to ON.

Step 6: Log In with Your PremierVPN Credentials
- When prompted, enter your PremierVPN Username (email) and Password.
- Tap Connect to continue.

Step 7: Trust the Certificate
If a security warning appears, tap Continue or Trust to accept the VPN certificate.
Step 8: Successful Connection
- Once connected, the app will display Connected under AnyConnect VPN.
- You are now securely connected to PremierVPN via AnyConnect.

Need help? If you have trouble connecting, open a support ticket and we’ll assist you.
Open a Support Ticket