How to Set Up Cisco AnyConnect on macOS
This guide walks you through installing and configuring Cisco AnyConnect (Cisco Secure Client) on macOS to securely connect to PremierVPN.
Open Client Area View All Guides
Step 1: Install Cisco AnyConnect
- Open the App Store: Click the App Store icon in your dock or use Spotlight (
Cmd + Space) and search for "App Store". - Search for Cisco AnyConnect: In the App Store search bar, type Cisco AnyConnect and press
Enter. - Download & Install: Select Cisco Secure Client from the iPhone/iPad section and click Get. It works seamlessly on macOS even though it’s listed under iOS apps.

Step 2: Launch Cisco AnyConnect
- Open AnyConnect: Find it in Applications or use Spotlight search (
Cmd + Space) and type AnyConnect. - Accept License Agreement: On first launch, you may be prompted to accept the license terms. Click Agree.
Step 3: Configure the VPN Connection
- In the Cisco AnyConnect window, click Connections in the sidebar.
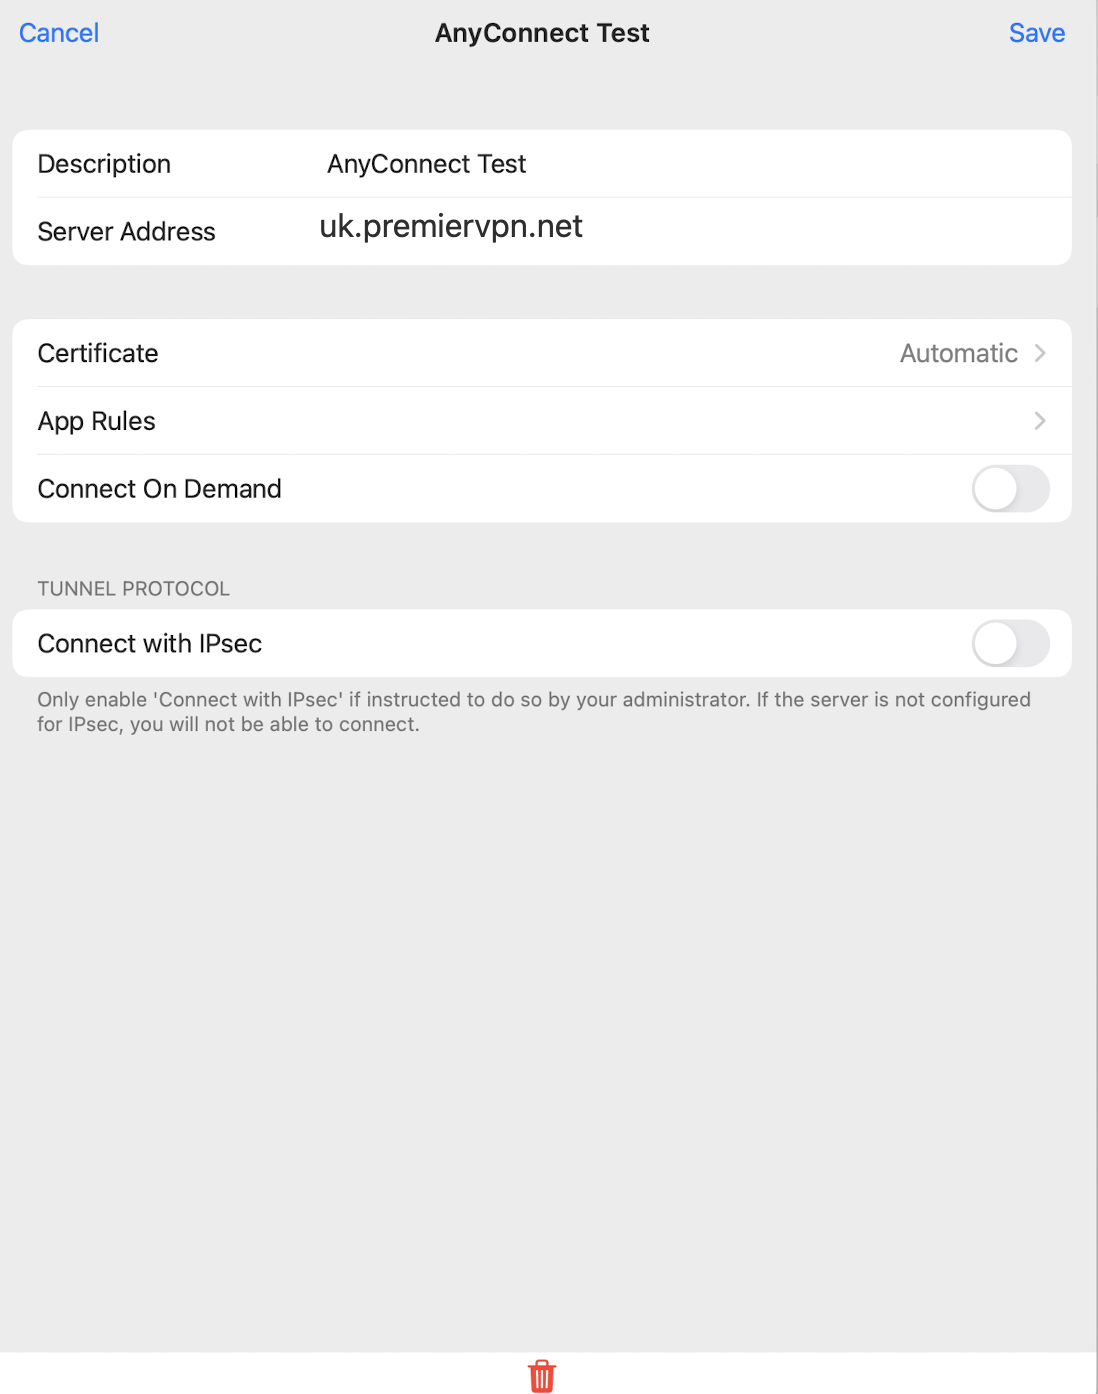
- Click Add VPN Connection.
- Enter a Description (e.g. “PremierVPN”).
- In Server Address, enter: uk.premiervpn.net.
- Click Save.

Step 4: Authenticate & Connect
- Enter Your Credentials: When prompted, enter your PremierVPN Username (email) and Password (not your billing login).
- Enable the VPN: In the sidebar, slide the AnyConnect VPN switch to On.

Step 5: Trust the Certificate
If a certificate warning appears, review the details and click Trust to continue.
Step 6: Confirm Your VPN Connection
- AnyConnect will show Connected in the sidebar when active.
- Verify your VPN is working by visiting vpnleakcheck.com — your IP should display the VPN location.
Step 7: Disconnect When Finished
- Open AnyConnect and slide the dial to the left to disconnect.
- To reconnect, simply open AnyConnect and slide the dial back to the right.
Troubleshooting Tips
- Connection Issues: Double-check your username, password, and hostname (uk.premiervpn.net). Ensure your internet connection is stable.
- Certificate Warnings: Only trust certificates from known, secure sources (PremierVPN’s servers).
Need help? Our support team can assist with setup and troubleshooting.
Open a Support Ticket
